Gaming Table Sizes
For all pople who are thinking about the best size for a gaming table, I looked up the recommended size in a few rule sets, to get an impression for what size is mostly needed.
- Chronopia: 120 x 180 or 120 x 120 cm for smaller battles
- DBA: 60 x 60 or 90 x 90 cm (depending on figure scale)
- DBM: 120 x 180 or 150 x 270 cm (depending on figure scale)
- Fantasy Warriors: 120 x 120 or better 120 x 180 cm
- Killzone: "any surface"
- Rapid Fire: 150 x 240 or better 180 x 240 cm (but less space is also ok)
- Warhammer Fantasy: 120 x 180 cm
- Warhammer 40k: 120 x 180 cm
- Warzone: "any clear, flat area" - but theres a drawing in the book that looks like 120x180cm
So the most common size is 120x180, or 6 small modules of 60x60cm.
Always remember, you need a surface where you can put your gaming modules on.
A common ping-pong Table is 274 x 152,5 cm, a paste table is roughly 300 x 60 cm, the ordinary kitchen table 120 x 80 cm.
When you're placing the 60x60cm modules on a kitchen table they're overlapping the table 20 to 30cm at each side. Keep that in mind when you're placing heavy objects near the edge of the gaming table.
Hard polystyrene boards are about 120x60cm. You can either place them under your modules to provide more stability or build your gaming table directly of those boards, 3 of them make the common gaming table size.
May 2007 by WitchfinderGeneral
The Tavern - part 2
Here's my solution for the problem with the 2nd floor that is hiding everything: Just pull the 1st floor wall more to the front. Very easy. I bought another 4 pieces of wood. The one is a bit longer than necessary to give the constuction more strength.
Then I had another idea - Fortunately before I glued everything together! I wanted all the interior movable, so I needed a connection system. I first thought about some kind of plug connection or to try out small pieces magnetic paper. But why not using real magnets?? I'll cover everything with parquet flooring so I can drill cut and glue whatever I want under the floor.
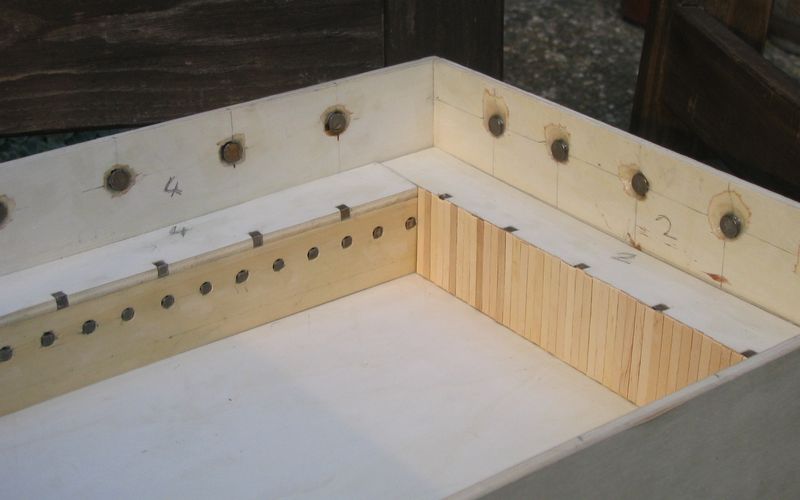
I organized some 5mm quadratic magnets, these will be in the wall. For the 2nd floor wall I'll use 1cm round (but only 3mm thick) magnets.
Now to the work:
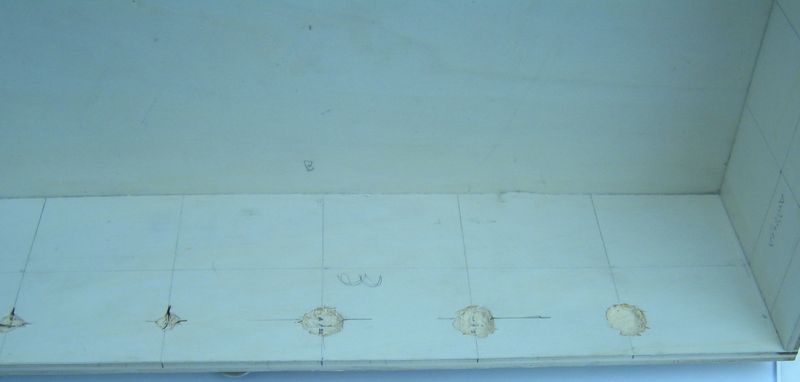
Here you can see how it looked like after I cut the holes for the magnets.
Here you see the holes in the 2nd floor wall. I had to cut them with a knife which was no fun at all.
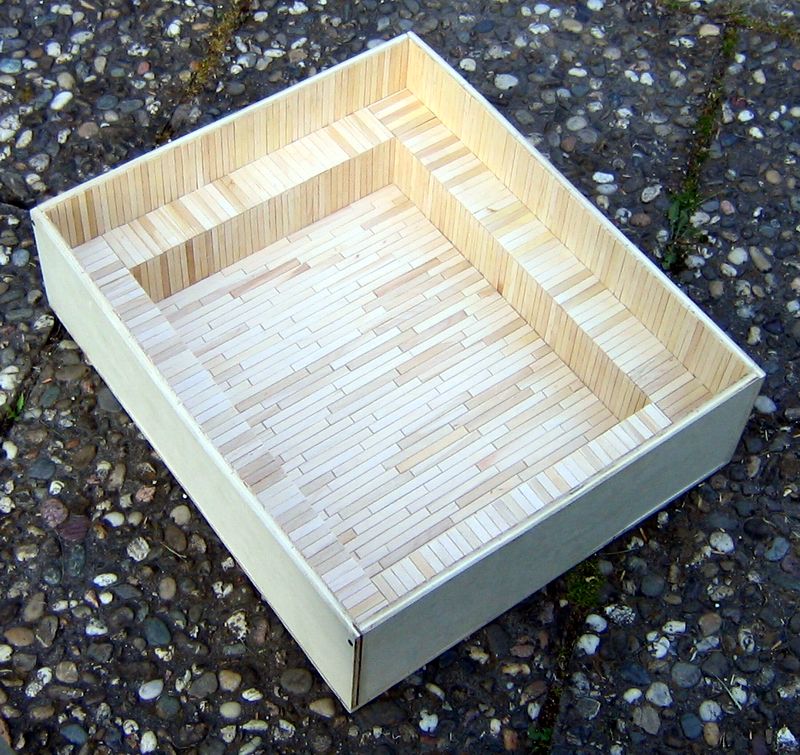
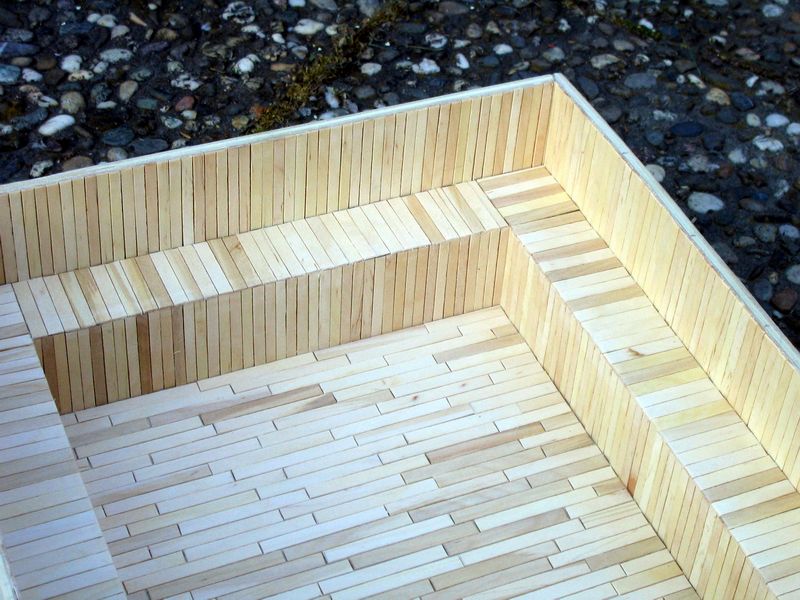
To cover the floor and the walls I used 2 different kinds of coffee stirrers (left: 140 × 6,5 × 1mm, right: 140 × 5 × 1,3mm).
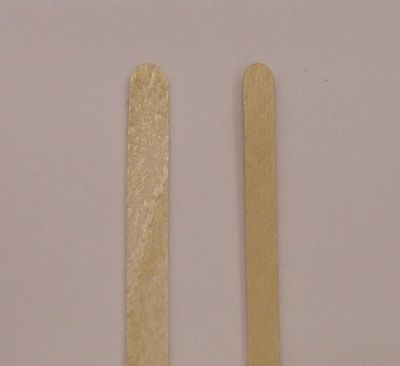
The smaller ones are more in scale. But which room is 20 metres long? So I used the larger stirrers for the floor, this way the room looks a little bit smaller.
The smaller stirrers were used for the wall. This way it looks more interesting and there'll be a lot of other stuff hanging at the walls anyway.
This is how it looked when everything was assembled and I started with the boarding.
And that's the finished tavern!
Actually...
...a lot of important parts like the handrails, doors, stairs, lamps, tables, etc. were still missing at this point.
April 2007 by Chris WitchfinderGeneral
Crusader the Ion Age - is coming soon
I don't want to do much "news" stuff in my weblog, there are other sites that do that job better. But today I found something on the web I think that needs to be mentioned.
Crusader the Ion Age is the new game that's coming out soon (and I hope really soon!) from Alternative Armies.
It will be on platoon level and one 28mm mini representing one man.
Their website says it is "depicting the Human Confederacy and their Crusaders, the ancient Khanate Empire and their allies; with more alien races being released as time progresses." - This sounds to me like the basic idea of 40k Rogue Trader!
And now look at some of the figures
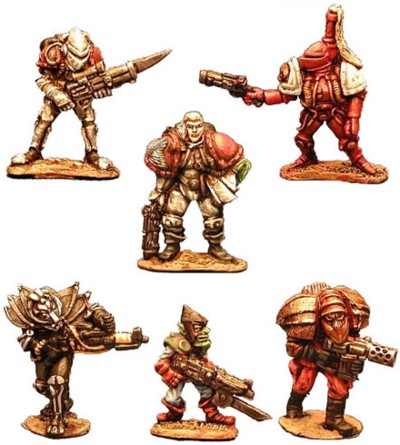
Absolutely awesome!!
At least to me. :D
I just love this old figure style, mixing 80's spaceflight outfits with Roman Empire and Steampunk elements.
More infos here when I get them!
March 2007 by WitchfinderGeneral
Price per miniature (2007)
- Copplestone Castings (any Future Wars pack) 11,43 Euro for 5 minis
= 2,29 Euro/miniature - em4miniatures (any FantasyWarriors or FutureSkrimish) 1,84 Euro for 1 mini
= 1,84 Euro/miniature - Fenryll (most of the packs) 9,50 Euro for 3 minis
= 3,17 Euro/miniature - Games Workshop (e.g. Space Marine 10 Figures plastic kit) 29,95 Euro for 10 minis
= 3 Euro/miniature - Iron Wind Metals (most Partha Classics - Fantasy Adventurers) 2,22 Euro for 1 mini
= 2,22 Euro/miniature - Prince August (Warzone - e.g. Bauhaus Venusian Rangers) 12,49 Euro for 7 minis
= 1,78 Euro/miniature - Prince August (most Mithril Classic packs) 4,50 Euro for 1 mini
= 4,50 Euro/miniature - Pulp Figures (most of the packs) 10,15 Euro for 5 minis
= 2,03 Euro/miniature - Rackham (Confrontation - e.g. Kelt Fiannas 01, Valkyries of Alahan 2) 10 Euro for 3 minis
= 3,33 Euro/miniature - RAFM (any Call Of Cthulhu - Player Characters) 5,23 Euro for 3 minis
= 1,74 Euro/miniature - Reaper Miniatures (most Dark Heaven Legends) 3,00 Euro for 1 mini
= 3,00 Euro/miniature - Wargames Foundry (most of the OldWest, CUTthroats) 14,50 Euro for 6 minis
= 2,42 Euro/miniature
I know it's difficult to compare because the figures aren't all of the same size, aren't sold in the same quantity, aren't all of the same quality etc. Just look at it as a very rough guide. Maybe I'll do an update somewhen in the future.
March 2007 by WitchfinderGeneral
The Tavern - part 1
Like I promised, here's one of the projects I'm working on.
This will be the final version of my tavern. I'll use it for swashbuckling fights and all scenarios where I need a closed room with lots of space.
I decided when I did a test game that this tavern should be as variable as possible. That means that all interior should be movable. And I don't mean only tables and chairs. Also the bar, the stairs, even the doors should not be fixated!
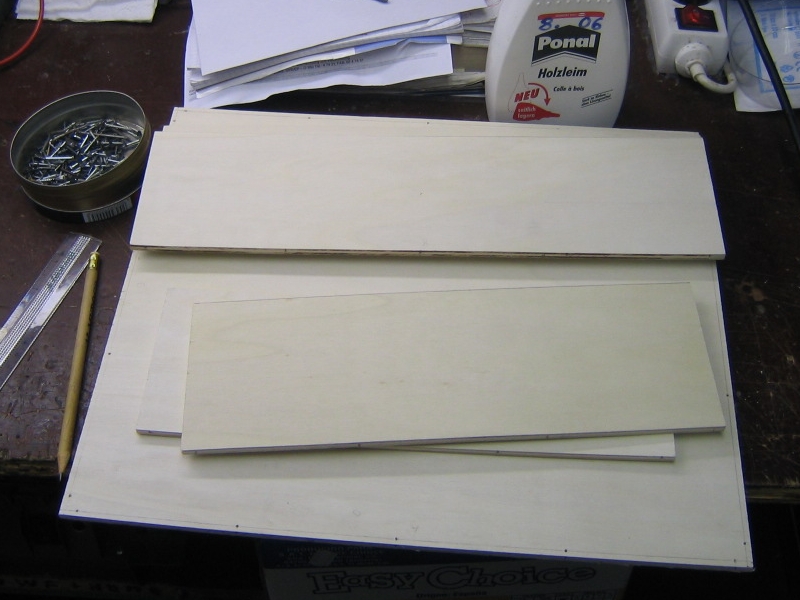
The wood I used is 6mm plywood, most of it was already cut for me at the DIY store.
38 × 32cm for the base, 38 × 10cm for the long side walls and 30,8 × 10cm for the shorter side walls.
The 2nd floor gangway is 36,8 × 3,5cm and 30,8 × 3,5cm. 3,5cm is a good size, so a 25mm base fits easily on it, even when I put a handrail on the gangway.
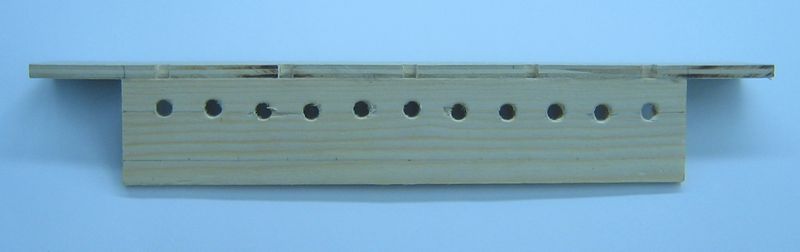
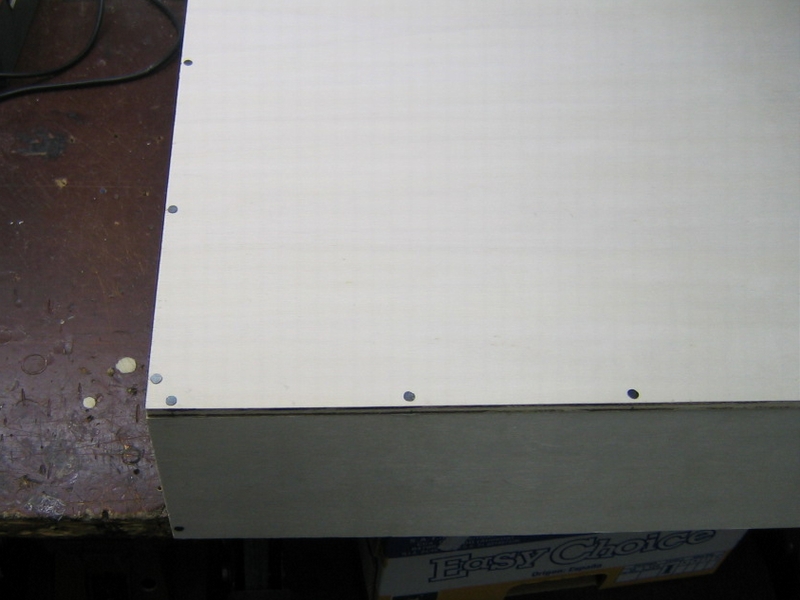
This are the parts I needed, all marked for drilling
I drilled some holes for the nails. I just had to put in the nails because the wood was warped and I couldn't have fixated it otherwise.

The finished and glued frame for the tavern!

Another picture of the small nails I used. This picture is taken from the underside.
I feared this would happen! Can you see the figure standing under the gangway? I can't! And if I leave it that way I won't see any decoration I wanted to put on the walls!

But I already found an easy solution, I haven't bought the wood yet, so I can't show you any pictures.
By the way, my deadline for this project is 26th April...
March 2007 by WitchfinderGeneral